Showing posts with label diy. Show all posts

Wednesday, July 2, 2014

No. 28: Nail Polish

Heyaa!
So today I'm posting something about nail polish since I'm  in love with nail polish right now (well, always anyway). I just like how nail polish make an outfit complete. But at some point branded nail polish are pricey and we could always use that money for something better. So I decided to make my own nail polish with the help of internet.

So here are some stuff that you need!
1. Eye shadow (colors of your choice)
2. Transparent nail polish or topcoat
3. Toothpick
4. Paper


How?
1. First you need to scrape the eyeshadow according to the color that you want

2. Then make yourself this kind of circular look to the paper and make sure that there is a hole in the bottom so that the eyeshadow can go through to to the transparent or topcoat nail polish

3. Once you put in the eyeshadow, mix it well to the nailpolish and there ya go! You made yourself a nailpolish


So this is the nailpolish that I made, i think this is the fun and best way to make a nailpolish if sometimes you feel like that branded ones are expensive. I will probably make more nailpolish like this throughout the summer holiday since I'm having one right now.

See you guys next time
BYE

Monday, May 12, 2014

No. 25: Statement T-Shirt DIY


Hey guys!
It's been a long time since I posted anything since APRIL, oh my god I am such a bad person. Anyway this post have been on my draft since who knows when. I know that from the last one I kept on posting DIY's so you may be sick of it, but I enjoyed making this one so I hope it will be the same to you to! So then lets get it starting


Plaid Shirt: GU
Skinnys: Stradivarius
Necklace: Traffic


Today's DIY is the Statement Tees. Sometimes when you have this simple t-shirt and you are bored with it, you feel like doing something to it. And it crossed my mind, why not make something and "re-new" it? So this is what I have created.

You Need:
1. T-Shirt
2. Plastic Sheet/Cardboard
3. Masking Tape
4. Permanent Marker
5. Design


How?

1. All you need to do is decide the place where you want to design it and border that part out with your masking tape.


2. Put in the plastic sheet/cardboard or even anything to not make the marker go through to the other side.


3. Then you start the design that you have chosen with your permanent marker to the t-shirt that you have. Make sure that it is Permanent Marker so that it wont wear off when you wash it.


4. After drawing/writing your design, take off the masking tape


5. And that is it! You have made your own first DIY T-shirt!


dont mind my neck
I hope you like this post and see you soon
If you make one of these make sure to tag me in instagram or twitter
BYE

Wednesday, April 23, 2014

No. 24: Fruit Yogurt Popsicle DIY

So today I am posting a Fruit Yogurt Popsicle DIY for you. It's not hard to make
and the ingredients are not that hard to find, plus you could make this if you have some friends coming over, or you could even make this for yourself. This popsicle is pretty healthy (i guess) and its also yummy so it's a big plus.

You need:
1. Yogurt
2. Fruits
3. Condensed Milk
4. Sugar
5. Popsicle Molds or Paper Cup


How?
1. All you have to do is cut the fruits to small parts and when you are done put it inside the Popsicle Molds, but make sure that your fruits are clean and you divide it equally to each mold. For my popsicle, I have used Strawberry, Banana, and Kiwi.


2. Then, in a different bowl put in yogurt, condensed milk, and sugar all together and mix them according to the sweetness that you like. Make sure that you have enough for all parts of the mold. 


3. After mixing them pour it in each mold equally, but not full because after you put the lid, it will just spill all over the place. So make sure that you pour 3/4 to the mold. Then you wait for around 5 hours or more.


4. After all that waiting, you can finally enjoy the fruit yogurt that you made!


It just tasted really amazing. 3 people have tried the popsicle and they said that it is yummy so, I got a pat on my back for doing such a good job (with the help from my mom)..

That is it for todays blog, I hope you like it
If you did make one make sure to tag me in wheter if its from instagram or twitter, which is fine
BYE

Friday, April 18, 2014

No. 23: Canvas (Room Decoration) DIY


Hey Guys!
So today I am doing to make 2 DIY's for room decorations from Canvas. I think this is the cutest and the easiest way to make it. Enjoy!
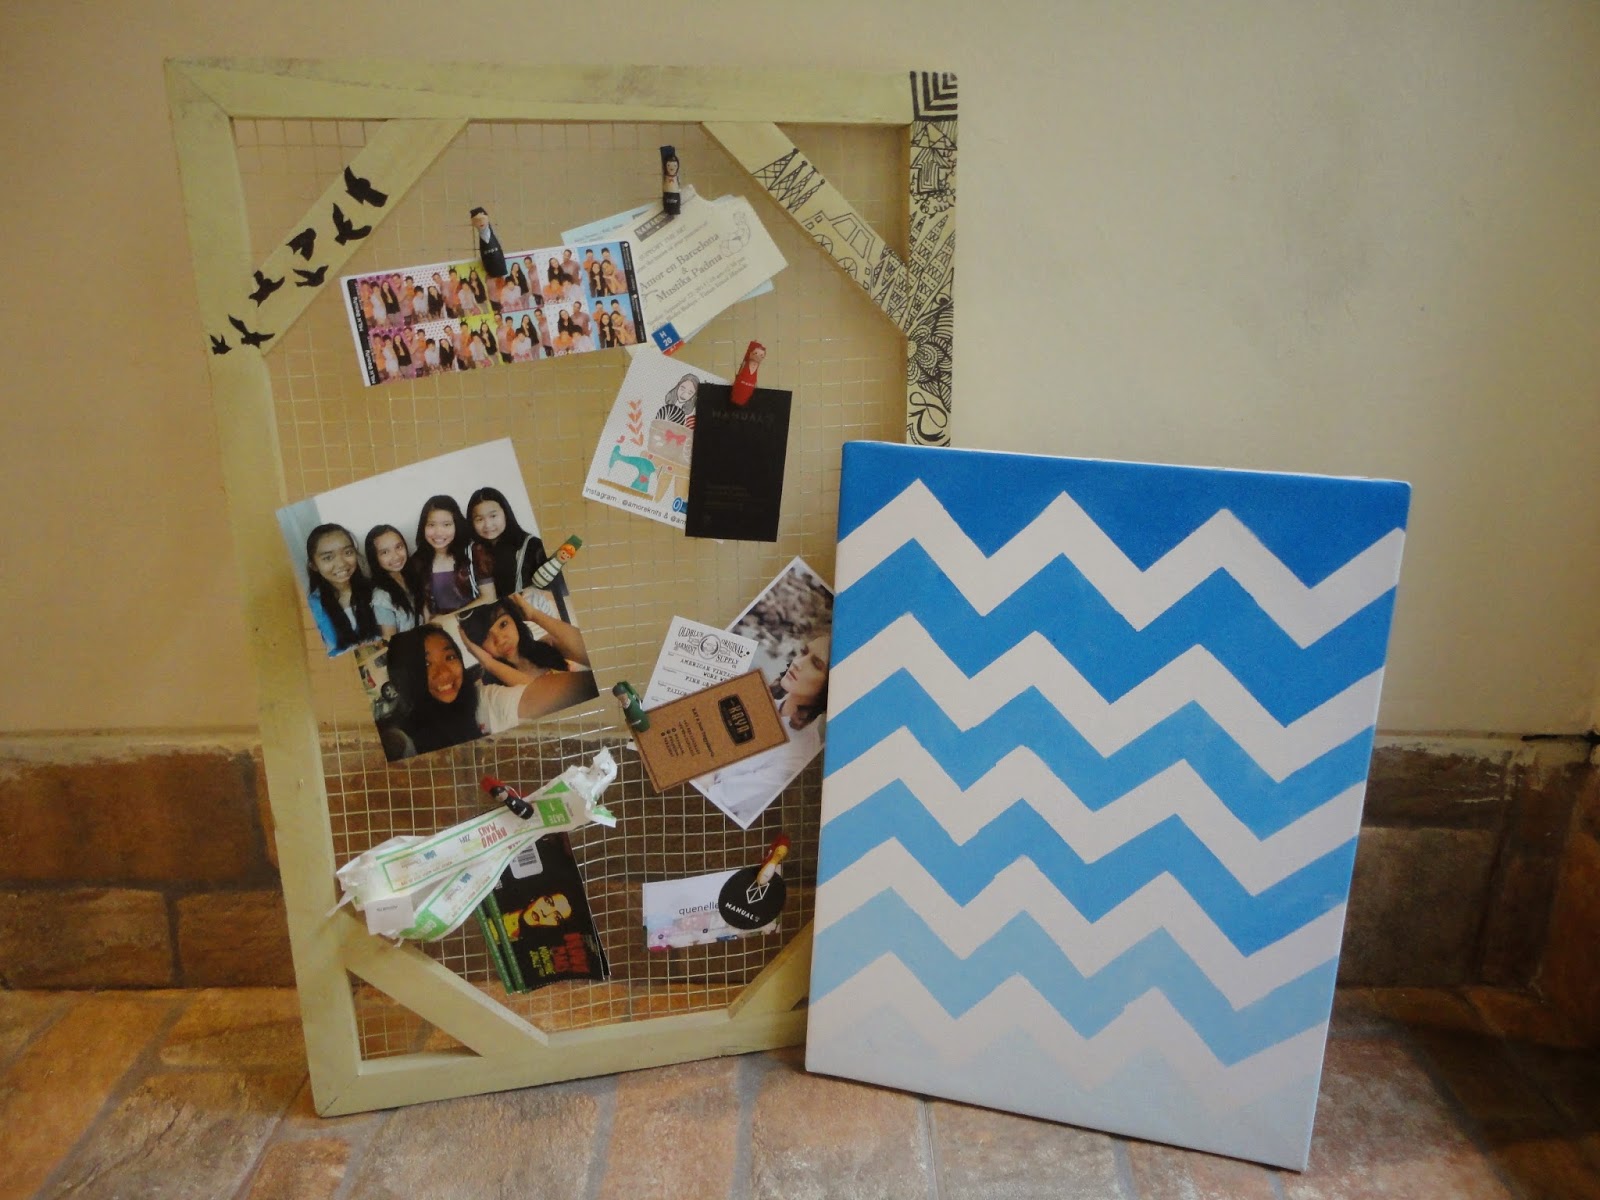
I. Cute Wallpaper
All you need:
1. Canvas (I used 30 x 40cm)
2. Acrylic Paint
3. Sponge
4. Masking Tape
5. Scissors/Cutter
6. Pallet
7. Pensil
8. Glitter
9. Glue
10. Paint Brush

How:

 1. You need to make a pattern with your masking tape, I made this tribal look but if you want to make other patterns then that's fine. When you tape them, make sure to press & put them neatly so that the pattern looks nice in the end

2. If you're making the same pattern as I am, cut the sponge into 6 pieces because my pattern has 6 layers. FYI: One piece of sponge equals to one color. So it is according to your pattern, if yours have 8 then cut it into 8 pieces.


3. After you cut the sponge, pick out the color for your craft. For today, I have chosen blue. I used the titanium white and phthalo blue from Reeves. We are going to color it from the lightest color to the darkest


 4. Once you are done making the first color, add a little bit of the 2nd color that you have chosen, and then re-do the second step until all the layers are done. After you have finished dabbing the sponge to the canvas, let it dry for around 10 minutes.


5. When its dry, take off the masking tape slowly and carefully. And if this is good enough for you then its done! But in my opinion, it needs something more so I decided to add some word.


6. First, find some ideas (quotes, word, drawing,etc.) that suits the canvas well. As for me, I picked the word 'Blue' because, well.. its blue. And if you pick a word, make sure its a bubbleword so it is easy to cut. If you are under 15 years old or so, have some supervision when you use the cutter.


7. When you are done cutting it, stick the paper to the canvas with the Masking Tape so it wont move around easily.


 8. Paint the glue to the part that you want to glitter it and make sure you got all sides. Then when you are done with that, glitter it with the glitter that you have. For this one, I used 2 bottles of blue glitters. After all the glittering is done wait for around 5 minutes to settle down. And while waiting you could clean up all the mess that you made.


After it has dried off, take off the paper carefully and yeah, thats the finish look for my work!

II. Canvas Frame
For the second craft, I made this canvas frame from used canvas so it doesnt have to be a new one. This one is actually like 3R's and it is quite tricky to make but its worth it.

All you need:
1. Used Canvas
2. Spray Paint
3. Stapler
4. Pliers


1. First you need to take the stapler out from the side of the canvas with the pliers.


 2. Then spray the canvas as for your liking, for myself I chose the color Colt Yellow. After you have sprayed them, let it dry for around 15 minutes


3. After you are done waiting, you can just draw on the sides or put some memorable stuff that you had in your life which I think is pretty cute


And that is it for todays post, I hope this DIY helped you with your room decor or just to give you some ideas


If you make one make sure to tag me in it through instagram or twitter
I would totally love to see what you have created
And also if you would like to see more DIY's then follow me and comment on what DIY's I should do
BYE